Ubuntu Server is a server operating system (OS), which is developed and owned by Canonical.
Ubuntu Server is compatible with different architecture types, which means it can run seamlessly on the following:
- x86
- x86-64
- ARM v7
- ARM64
- POWER8, and
- IBM System z mainframes via LinuxONE
requirements
- RAM: 4GB memory
- CPU: 2GHz dual core processor
- Storage: Minimum 25GB disk space
- USB Drive: Minimum 4GB USB drive
Step 1: Download the Installation Media
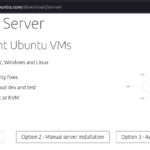
you need to visit the Ubuntu Server download page and select Option 2 – Manual Server Installation ,The latest version is Ubuntu 21.10, if you looking to Long-Term Support (LTS) version, try 20.04 LTS , It will get support and updates until April 2025.
Now ,Download the Iso. we use 21.10 in this tutorial.
Step 2: Create a Bootable media USB or DVD
You need to burn ISO file on DVD or USB flash ,If you have a desktop computer with DVD , run ubuntu desktop , you can burn the iso using some burner application like Brasero.
Using USB stick is a good idea, on ubuntu desktop just use Startup Disk Creator
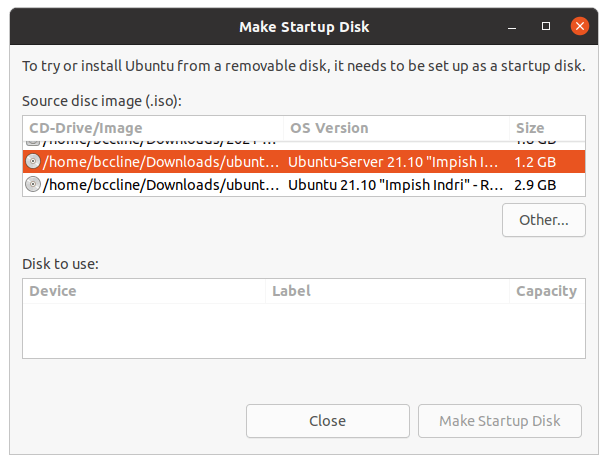
you can use any other way to make bootable USB, VENTOY -as example- is a good choice ,you can use it simply on windows or linux machine.
Now ,the bootable version of Ubuntu on a USB stick is now available for installation.
Step 3: Set the Boot Order
Within the BIOS menu, select which devices should be checked for a bootable OS. The options include internal hard disks, USB storage, and the CD/DVD-ROM drive (where available). Choose the device that matches how you set up the boot media above.
Most BIOS versions allow you to call up boot menus on start-up; you can use the following keys to pull it up, depending on the model you are using.
| Manufacturer | Booting keys |
| Lenovo | F8, F10 or F12 or FN+f2 |
| Asus | F8 or Esc |
| Dell | F12 |
| HP | F9 or Esc |
| Acer | F12, F9 or Esc |
| Samsung | F2, F12 or Esc |
| Toshiba | F12 |
| Fujitsu | F12 |
Insert the Ubuntu Server installation that you created. Switch on the computer and wait for it to boot from the USB or DVD drive.
Step 4: Start Your Installation
Select Install Ubuntu Server option from the list of options.


Note: In case you have a NVIDIA graphics card installed on your system, you can select Install Ubuntu Server (safe graphics) option from this list instead.
Step 5: Select the Language And Keyboard Layout.


you can skip the Installer Update or use it .
Step 6: Configuring Network Interfaces
To make the server installation a success, at least one network interface needs to be configured, to allow the server to communicate with other systems on the network.
If an Ethernet cable is connected to your Ubuntu Server device, select the eth option. For Wi-Fi connectivity, choose the interface with a DHCP IP address displayed. Note that by selecting this option you can also switch it to a static IP.

To configure a static address, select eth0, and press Enter. You will then need to select IPv4 or IPv6 and assign the correct subnet, address, gateway, and name server addresses.
The next screen will ask you to configure a proxy address. If you use one to access the internet, enter that address here, otherwise leave it blank and select Done, and press Enter:

Step 7: Choose Ubuntu Archive Mirror
In case you don’t want to set a default address, you have the option of selecting an alternative.

Step 8: HDD Configurations
Use an entire disk: Selecting this option will erase the entire hard disk and automatically partition the drive for you. Please make sure you don’t have any valuable information stored previously, as you won’t be able to retrieve this information once the partitions are created.
Custom storage layout: This option is solely for intermediate and advanced users, and lets you set up partitions and choose one for installing Ubuntu Server. Avoid this if you are new to installing server operating systems.
For this guide’s purposes,I’am going to stick with the defaults as much as possible. Ensure Use an entire disk is selected, and that Set up this disk as an LVM group is selected. With both selected, choose Done and press Enter:


Step 8: Configure Your Profile
Your name
Your server’s name
Pick a username
Choose a password
Confirm your password
remember that Ubuntu Server a sensible name so you can easily find it on the network. Also, use a password that is both secure and memorable.

Step 9: SSH Setup
You often need a securely access your server remotely by setting up OpenSSH server details. You have the option of importing an SSH identity key from GitHub or Launchpad, if you like.

If you don’t want to import a key, select Done, followed by Enter.
Step 10: Install Featured Server Snaps
There are some popular snaps, which can be installed on the server post installation. Each one has a description so you know what it is for.
Select the required snaps, As example :If you want toselect PowerShell and choose Done followed by Done and Enter.

Step 11: Installation Complete
After a few minutes and, you need to Reboot. Press Enter and the server will restart.

Now Ubuntu server ready to run.